
Handmade with Love: Calligraphy in DIY projects like handmade cards, gift tags, and home décor

In a world that values handwritten sentiments and personalized crafts, calligraphy and lettering are powerful tools of expression. From heartfelt handmade cards to charming gift tags and chic home décor, the magic of calligraphy and lettering brings a touch of elegance and warmth to DIY projects. So come with me on an artistic journey, exploring the endless possibilities of these beautiful art forms in adding a personal touch to our everyday creations.
There's something enchanting about receiving a handmade card or gift tag adorned with intricate lettering and graceful calligraphy. In our digital age, these timeless art forms take us back to a simpler time, where each stroke of the pen echoes the care and thought put into crafting a message or design. Whether you're a seasoned calligrapher or a budding lettering enthusiast, the allure of adding handmade elegance to DIY projects is undeniable.
Handmade Cards: A Symphony of Sentiments
Handmade cards go beyond mere pieces of paper; they encapsulate emotions and feelings, making them cherished keepsakes. Calligraphy and lettering take center stage in crafting heartfelt messages that speak to the soul. From elegant scripts to playful lettering styles, each card becomes a symphony of sentiments, expressing love, gratitude, and celebration in the most enchanting way.


Gift Tags: Personalizing Presents with Panache
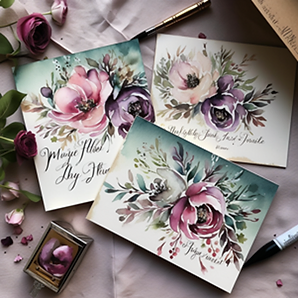
Gift-giving becomes an art form when we infuse our creations with personalized touches. Calligraphy and lettering transform simple gift tags into miniature masterpieces, turning presents into unforgettable tokens of affection. Whether it's an elegant monogram, a playful illustration, or a heartfelt quote, gift tags add a touch of sophistication and flair to every package.
Home Décor: Transforming Spaces with Artistic Flourishes
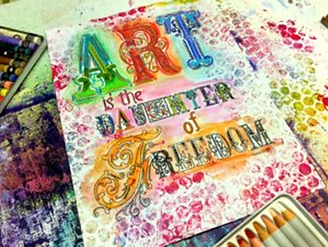
Home is where the heart is, and what better way to make it uniquely yours than with personalized home décor? Calligraphy and lettering breathe life into decorative elements like wall art, quote canvases, and signs. Whether you're adorning your living room with a motivational quote or creating a customized piece for a nursery, these artistic flourishes add warmth and character to every corner.


Tips and Techniques for Calligraphy and Lettering in DIY Projects
Ready to dive into the captivating world of calligraphy and lettering? Here are some tips to get you started:
Choose the Right Tools: Invest in quality calligraphy pens, brush pens, or markers that suit your style. Experiment with different nib sizes and ink types to achieve the desired effect.
Practice Makes Perfect: As with any art form, practice is key. Set aside time regularly to practice your lettering and calligraphy skills, focusing on different styles and techniques.
Select the Perfect Words: Choose meaningful messages or quotes that resonate with the occasion or recipient. Thoughtful and heartfelt words paired with beautiful lettering will leave a lasting impression.
Play with Typography: Mix and match various lettering styles, such as modern calligraphy, brush lettering, or serif fonts, to create dynamic and eye-catching compositions.
Embrace Flourishes and Embellishments: Add artistic flourishes, swirls, and small illustrations to complement your lettering. These details can enhance the overall aesthetic and make your cards stand out.
Incorporate Colored Ink: Experiment with colored inks to add a pop of vibrancy to your lettering. Consider blending colors for a stunning gradient effect.
Mind Your Spacing and Alignment: Ensure consistent spacing between letters and lines, and pay attention to alignment to maintain a polished and professional look.
Use High-Quality Cardstock: Choose premium-quality cardstock for your cards to create a sturdy canvas for your lettering and calligraphy. Smooth surfaces work best for clean and crisp lines.
Practice Layering Techniques: Explore layering techniques, such as combining calligraphy with watercolor or embossing, to add dimension and depth to your cards.
Add Personalization: Personalize your cards with monograms, initials, or custom illustrations that resonate with the recipient's interests or hobbies.
Experiment with Card Shapes: Go beyond standard rectangular cards. Try circular, square, or even unconventional shapes that complement your lettering and calligraphy.
Keep it Simple and Cohesive: Avoid overcrowding your card with too much text or intricate designs. Aim for a balanced and cohesive composition that draws attention to your lettering.
Pay Attention to Detail: Check for any smudges or mistakes before finalizing your cards. Attention to detail ensures a professional and polished final product.
Don't Fear Imperfection: As with any artistic pursuit, embrace imperfections as part of the charm of handmade creations. Each card is a unique expression of your creativity and artistry.
As we conclude this artistic journey, we celebrate the magic of calligraphy and lettering in elevating DIY projects. From handmade cards that speak to the heart to personalized gift tags that add flair to presents, these art forms infuse every creation with warmth and elegance. With the right tools, techniques, and a dash of creative courage, anyone can embark on this enchanting journey of self-expression and artistic fulfillment.
If you want more tips and tricks or want to learn technique, check out my card making book here:
Of if you want to master lettering techniques, you can check out my book on lettering:
Have fun crafting!